Monday, July 30, 2012

Thai Peanut Butter Chicken with Rice Noodles

So this one day, I was at the store, and I saw a bottle of "Thai Peanut Sauce,"  and I thought, "YUM!  That sounds delicious!"  Turns out, it was horrible.  I'll spare you (and the makers) from telling you what brand it was.  No need to knock them down.  After all, I do like other items in their line.

In an effort to still get to enjoy some Thai Peanut Butter Chicken, I read the ingredients on the back of the bottle and decided to give it a try myself. 

INGREDIENTS:

1 cup crunchy peanut butter
1/2 cup soy sauce
3 Tbsp sweet chili sauce
1 cup low sodium chicken broth
1 Tbsp fresh ginger or ginger paste
1 Tbsp minced garlic
Dash red pepper flakes
1 lb chicken breast, cooked and cut into small pieces
1 cup frozen shelled eda mame
1 cup carrots (match-stick shredded or thinly sliced)
8 oz rice noodles, cooked per package instructions (like pasta)

DIRECTIONS:


Cook eda mame and carrots.  I use a microwave rice cooker/vegetable steamer.  You can also just put them in a microwave-safe bowl with a couple Tablespoons of water.  On the stovetop, cook rice noodles per package directions.

 Meanwhile, place sauce ingredients (peanut butter through red pepper flakes) in a saucepan over medium heat until peanut butter is melted.  (If you're sauteing the chicken, you can use the same pan you sauteed the chicken in.)  Add chicken, vegetables, and rice noodles to sauce and stir until coated.  Serve.

HANDY TIPS:

Have some leftover chicken broth and not sure what to do with it?  Freeze in ice cube trays or these fantastic silicone ice cube thingy-ma-bobs that take up much less space in your freezer.  Then, when you need just a little broth to lighten up a dish, you've got it!

For the chicken, you have several options.  1) Cut up raw chicken and saute in a small amount of oil with salt and pepper.  Use this same pan for the sauce (no need to wash out the pan - the chicken "drippings" will add more flavor. 2) Use pre-cooked chicken from the deli section of your grocery store.  Not as much flavor here, but easy-peasy.  3) Pan-sear and then oven-bake chicken breasts when you buy them.  Freeze individually, and then wrap in foil.  When you need one (or two), thaw, cut and use appropriately.  That's what I did here, using 2 chicken breasts.

Cooking for one isn't nearly as difficult as we make it out to be.  It just makes me make better use of my freezer space and my math skills. (I cut this recipe in half tonight so I didn't have as many leftovers.)  Its the cleaning up after myself that I hate so much...

Friday, July 27, 2012

Breakfast Bites

It's the most important meal of the day: Breakfast.  Why is that?  I'm sure doctors and researchers will tell you lots of things about why eating breakfast makes you more likely to be healthier.  For me?  What I eat for breakfast sets the tone for what I eat all day.  If I start my day with a sugary donut, well, you can imagine what goes across my taste-buds the rest of the day: more sugar.

After starting a "new life" in a new city recently, I thought maybe this was a good time to alter some of my bad habits into good (or at least better) ones.  Among these: Be intentional about what I eat for breakfast.  I've learned that adding protein to my breakfast routine helps keep me full longer, which means I don't reach for my morning snack quite so quickly.  Because I'm also a coffee drinker, I need some carbs in my breakfast to keep my coffee from eating my stomach.  Thus, after I'd joined the world of "egg muffins" (recipe below), I added a frozen waffle or two each day to counter-act my coffee addiction.

Then one day as I was perusing Pinterest, I came across a recipe for baked oatmeal.  I'd heard about baked oatmeal before, but wasn't yet a believer that oatmeal could be that good outside of cookies.  I don't dislike regular cooked oatmeal, but its not great, nor is it something I can eat on the way to work.  [Have I mentioned I'm not a morning person?  Sleeping is my favorite.]

I used the recipe I found on Pinterest as a basis for my baked oatmeal.  However, because I don't keep everything on her ingredient list on-hand, I made some substitutions, coming up with my own recipe, making some additional adjustments for taste and consistency.  I've made several variations over the course of a few weeks, and have found only one way so far that I don't like the baked oatmeal: with peanut butter. 

None-the-less, following is a great recipe that can be made like a cookie (with nuts & chocolate chips), like a muffin (with berries), or just plain (with a light banana and cinnamon flavor).


Baked Oatmeal

INGREDIENTS:

1 Banana
1 cup Natural Applesauce (2 4-oz individual cups)
2 Eggs
2 tsp Vanilla
6 oz Vanilla Yogurt
2 Tbsp Splenda Brown Sugar
2 Tbsp. Ground Flaxseed Meal
1-2 Tbsp Ground Cinnamon
1 1/2 tsp Baking Powder
1 tsp Salt
2 1/2 cups Rolled Oats (Old Fashioned Oatmeal)
1 cup Skim Milk
Various mix-ins (Chopped Walnuts, Blueberries, Chocolate Chips, Raisins, Craisins, etc.)

Preheat oven to 350 degrees.  Prepare 24 muffin cups with cooking spray.

Peel banana into a microwave-safe mixing bowl.  Microwave 30-45 seconds to soften banana (unless using a very ripe/brown banana).  Mash banana.  Whisk in applesauce, eggs, vanilla, yogurt, and Splenda.  When mixed well, whisk in flaxseed meal, cinnamon, baking powder and salt.  Stir in oats with a wooden spoon.  Finally, carefully stir in milk.  If you're going to add any mix-ins, now is the time to stir them in as well.

Using a cookie-dough scoop, scoop mixture into the muffin cups.  Divide remaining mixture among the cups evenly.  I've found that to divide into 24 "muffins," each muffin cup will get approximately 1 1/2 scoops (a little more if you're using mix-ins).

Bake at 350 degrees for 30 minutes, or until golden brown and a toothpick inserted into the center comes out clean.  Cool on a wire rack.  I usually keep them on the wire rack while freezing so that they don't stick together, and then transfer to a zipper baggie for storage.

Word to the wise: don't over-do it with your mix-ins.  Less really is more in this case.

Without the mix-ins, each of these is approximately 75 calories, as are the egg muffins, so any combination of 4 muffins makes a 300-calorie breakfast.  (If adding nuts and/or chocolate chips, you will go well beyond 75 calories.  Berries, however, only alter each "muffin" by a couple calories.)

COOKIE EDIT: Tonight before adding the milk I put a scoop of the mixture onto a cookie sheet (sprayed with cooking spray), flattened slightly with my fingers (the cookie won't flatten out in the oven like normal cookies do so go ahead and make it as flat as you'd like at this point), and then baked for about 12 minutes.  When I pulled it out of the oven, I placed 5 dark chocolate chips on top, and after they melted swirled them with my finger.   Once cooled, it made a FANTASTIC cookie!  It was very soft, so next time I might try this before even adding the yogurt.  [8/19/2012 EDIT: I tried it without the yogurt this time.  Its still soft, more like cake than a cookie, so I'm going to keep trying different things to make it more like a cookie.  Nonetheless, it still tasted incredible.]

APPLE-CINNAMON BAKED OATMEAL: (9/19/2012 EDIT) Its officially Fall this weekend (and I didn't have any bananas at home), so I decided to try an apple version of the baked oatmeal.  Mixing and baking instructions are the same, but I used the following ingredients:

1 apple (peeled, shredded)
1/2 Cup applesauce (1 4-oz individual cup)
2 Tbsp oil
2 eggs
2 tsp vanilla
6 oz Yoplait® Apple Turnover Yogurt
1/4 Cup packed brown sugar
2 Tbsp ground flaxseed meal
1-2 Tbsp ground cinnamon
1 1/2 tsp baking powder
1 tsp salt
3 cups rolled oats (old fashioned oatmeal)
3/4 Cup milk

Yield: 24 "muffins" at approximately 80 calories each - If you'd like a little crunch, chop an additional peeled apple into tiny chunks and mix in with the milk.  You'll only add an additional couple of calories per "muffin."  Dried cranberries could be a yummy mix-in for this one as well. 


Egg Muffins


Now for the protein.  I actually started doing this before I found all the recipes for "egg muffins" on pinterest.  I knew an egg was the best way to get protein into my breakfast, but, as I mentioned before, I'm not very good at waking up in the morning, so anything I can do to be prepared for my morning routine is best done well in advance.  Thus, I decided to make "egg muffins."  Its as easy as beating eggs, adding whatever goodies you like, bake in a muffin pan, and you've got yourself a pre-made breakfast.  Most people say you can keep them in your fridge for a week.  I just go ahead and freeze them, that way I can microwave my egg and oatmeal at the same time while I'm packing up my lunch.

INGREDIENTS:

12+ oz Eggs (mixture of whole eggs and egg whites - to your liking)
3 oz Sharp Cheddar, shredded
1 oz fresh Parmesan, shredded or grated
1 tsp. Ground Mustard (optional)
Pinch of Salt
Pinch of Ground Pepper

Preheat oven to 350 degrees.  Prepare 12 muffin cups with cooking spray. 

I use a plastic Tupperware shaker when mixing this up, it includes the measurements on the side so I know how much egg I'm getting.  You can get 12 oz of eggs in several different ways: 5 whole eggs + 5 egg whites, 6 whole eggs + 3 egg whites, I think you get the picture.  The more whole eggs you use the more calories you will be including.  However, its OK to have calories at breakfast.  [Really.]  Add ground mustard, salt & pepper to the eggs, seal the container, and shake til the eggs are "beaten."

Divide cheeses (or various mix-ins such as ham, veggies, etc) into the muffin cups.  Then pour in 1 oz of the egg mixture into each muffin cup.  I say to use "12+" ounces of egg as its sometimes difficult and tedious to get exactly 1 ounce into each cup.  (Honestly, I use a measuring cup that looks like a shot-glass - measures 1/2, 1, and 1 1/2 ounces.)  Stir each "muffin" lightly with a fork to mix in the cheese.

Bake 20-25 minutes.  The egg will puff up in the oven, and then shrink back down when cooling.  Once they've shrunk back down, cool on a wire rack.  Freeze on the wire racks, then move to a freezer container that will be easy to reach in the morning in my pre-coffee stupor.


Morning Routine:


Pull your desired amount of Breakfast Bites out of the freezer, wrap in a paper towel, and microwave for 60-90 seconds.  I eat 4 Breakfast Bites each morning, and 90 seconds is just about right.

Tuesday, June 26, 2012

BCTA (My Take on the Classic BLT)

BLT.  A summertime favorite.  Ever since I was a kid, though, I've never liked lettuce on a sandwich.  Its kind of a waste of space: no flavor, no nutritional value, you're basically putting water on your sandwich (no offense to those that like lettuce on a sandwich).  :)  Things did change a little since I was a kid, though, and I did at one point start liking mayonnaise on my BLT (my, um, BMT?). 

The BCTA is my take on the classic BLT.  Replace the lettuce with cucumber.  It doesn't have a ton more nutritional value than the lettuce, but there's more flavor than lettuce, and more crunch.  Then replace the mayonnaise with avocado.  Unlike mayo, avocado actually HAS nutritional value.  Not to mention the flavor of an avocado...  (Uh, anyone know the best way to get drool out of my laptop keyboard?)  All remaining ingredients are the same.

Here's what you'll need:

2 slices toasted bread
2 slices bacon, cut in half
3-4 slices cucumber
2-3 slices tomato
1/4 avocado, sliced

It all starts in the skillet.  Fry bacon til done.  If you like crisp bacon, fry til crisp.  I personally like mine a little bit under-crisp, but not completely chewy, either.  When the bacon is done to your likeness, drain on paper towels.

Meanwhile, while the bacon is cooking, slice tomato, cucumber, and avocado.  Slice the cucumber with your vegetable peeler (or mandolin slicer if you'd like) as we did for the Cucumber Feta Rolls.  Slice the tomato as thin or as thick as you'd like.


Assemble your sandwich and enjoy.


Tips for a better sandwich:
1) Thick-slice bacon is always better.
2) Garden-fresh tomatoes are a must.  This is why a BLT (or, in my case, BCTA) is best in the summer when you have access to good RIPE tomatoes.
3) Learn to pick a good avocado.  Not firm, but not too soft.  You'll get it right after a few bad avocados.
4) Use Saralee 45 calorie bread and you'll end up with a 250-275 calorie sandwich (depending on your bacon and avocado - they're your biggest calorie producers outside of the bread).


IN A NUTSHELL:

2 sliced toasted bread
2 slices bacon, cut in half
3-4 slices cucumber
2-3 slices tomato
1/4 avocado, sliced

Fry bacon.  Slice produce.  Slap it all together.  Let your tastebuds do what they do best.

PS - I learned this week that bacon is the "gateway drug" to vegans who become meat-eaters (Thanks Eve!).  Bacon.  I can't think of a better reason to eat meat.  Can you?  :)

Saturday, June 23, 2012

Pesto Chicken Artichoke Pizza

Pizza seems to be my easy evening go-to meal during the summer.  I keep pre-made pizza crusts on-hand, and, let's face it, you can put pretty much anything on a pizza crust, top it with some cheese and, voila, you've got dinner

This week I went a little bit more "gourmet" in pizza style, replacing the traditional red sauce with homemade pesto, and mozzarella with smoked gouda.

A couple of notes when you make your shopping list: 1) I make my own Pesto, but store-bought is ok, too.  If you want to make your own, I follow this recipe.  2) For the chicken it can be leftover grilled chicken breast or even leftover KFC (sans skin).  The chicken doesn't really add tons of flavor, just some protein and texture.  3) Sun dried tomatoes were not on my original pizza, but the second time I made it I had some on-hand from the Cucumber Feta Rolls and decided to utilize them.  You could also add some crumbled cooked bacon instead of the tomatoes (which is AMAZING, by the way - when isn't bacon amazing?).  4) Always buy smoked gouda.  The flavor added by the smoking process is what makes this cheese so fantastically amazing.

Here's what you'll need:

1 Individual Size Thin and Crispy Pizza Crust
2 Tbsp Pesto
1/4 Cup Chopped Cooked Chicken
1/4 Cup Chopped Artichoke Hearts (canned)
1 Tbsp Chopped Sun Dried Tomatoes
1-2 Tbsp Fresh Chopped Basil
Shredded Smoked Gouda Cheese

 Pre-heat oven to 400 degrees F.  If using a pizza stone, let the stone pre-heat with the oven (stone will need at least 10 minutes to heat fully).  While oven is pre-heating, chop chicken, artichokes, sun dried tomatoes and basil.  (Not sure how to cut basil?  Check out my instructions in the Sausage Bruschetta Pizza Recipe.)  Shred cheese.

Cover pizza crust with pesto.  Top with chicken, artichokes, sun dried tomatoes, basil and cheese.  Bake for 10-12 minutes.


Remove from the oven and slice into quarters with pizza cutter, serve, and enjoy! 


IN A NUTSHELL:

1 Individual Size Thin and Crispy Pizza Crust
2 Tbsp Pesto
1/4 Cup Chopped Cooked chicken
1/4 Cup Chopped Artichoke Hearts
1 Tbsp Chopped Sun Dried Tomatoes
1-2 Tbsp Fresh Chopped Basil
Shredded Smoked Gouda Cheese. 

Pre-heat oven to 400.  Chop pizza toppings.  Shred Cheese.  Assemble pizza.  Bake 10-12 minutes directly on rack or on pre-heated pizza stone.  Remove, cut, and WOW your taste-buds. 

As with any pizza, if you want to make a larger pizza, just use a larger crust and more of each topping! 

If you're feeling super-domestic and want to make homemade crust, my friend Tesa has a fantastic recipe on her blog.

Thursday, June 21, 2012

Appetizer Rollups


I both love and dread the announcement of "Food Day" at work.  I love it because I LOVE to cook and I LOVE to share my cooking with friends.  I dread it because I'm just not sure which recipe to pull out of my collection.  Appetizer?  Crock-pot concoction? Dessert? There are WAY too many choices.  The good news is that different styles of appetizer rollups are ALWAYS a hit.  Here I'll showcase both a tortilla option as well as a vegetable option.


Let's start with my old favorite:

Tortilla Pinwheels


This was probably the very first recipe I developed.  I was looking for something to make for my High School graduation reception.  There were some decent recipes out there, but none of them were quite what I wanted.  So, I put this recipe together, and its been a pot-luck and family-holiday favorite ever since.  

Here's what you'll need:

5-6 Burrito-size Tortillas
1 Pint Sour Cream
1 8-oz Pkg Cream Cheese, softened
2-3 Tbsp Southwest Seasoning*
1/2 Pkg. Ranch Dip Mix
1/2-1 small (4.25-oz) Can Chopped Black Olives
1/2-1 small (4-oz) Can Chopped Green Chilies
1 Cup Finely Shredded Cheddar Cheese
Thinly Sliced Ham (lunch-meat works well)

*Taco Seasoning will work, but I prefer Pampered Chef Southwest Seasoning

Mix together cream cheese and sour cream.  Stir in Southwest Seasoning and ranch dip mix; Stir in olives, chilies and cheese.


Spread mixture over tortillas.  Place ham in individual slices on top of spread.  Roll tortillas tightly.  chill in fridge at least 1-2 hours, either in an airtight container or wrapped in plastic wrap.

Once chilled (giving the cream cheese a chance to firm back up), slice into 1/2 inch slices and serve.  NOTE: Use a serrated knife and rely on the sawing motion to cut, not the downward motion.  This will help keep the shape of the roll.


Leftovers can be saved in an airtight container in the fridge for several days. 

IN A NUTSHELL:

5-6 Burrito-size Tortillas
1 Pint Sour Cream
1 8-oz Pkg Cream Cheese, softened
2-3 Tbsp Southwest Seasoning*
1/2 Pkg. Ranch Dip Mix
1/2-1 small (4.25-oz) Can Chopped Black Olives
1/2-1 small (4-oz) Can Chopped Green Chilies
1 Cup Finely Shredded Cheddar Cheese
Thinly Sliced Ham

Mix sour cream, cream cheese, Southwest Seasoning, ranch dip mix, olives, chilies and cheese.  Spread over tortillas, top with ham slices.  Roll.  Chill.  Slice.  Watch your friends DEVOUR.


P.S. Some people like these with salsa.  I think there's so much flavor already packed into these rolls, who needs to "water it down" with salsa?  Just my humble opinion.  :)


***OTHER GOOD FILLING IDEAS***


JALAPENO-BACON "POPPERS"
1 Pint Sour Cream
8 oz Cream Cheese, softened
1/2 of a 12-oz Jar Sliced Jalapenos, drained & chopped
1/2 Pound Bacon, cooked & chopped
1 cup Finely Shredded Cheddar Cheese


BUFFALO CHICKEN ROLLS
1 Pint Sour Cream
8 oz Cream Cheese, softened
12 oz (approx) Buffalo Chicken Bites (such as Tyson Any'tizers - Buffalo Style Boneless Chicken Wyngs), baked as directed, chopped
2-3 oz Louisiana Style Hot Sauce
*sprinkle some additional hot sauce over the finished rolls if desired.


 ***


Looking for a "lighter" option?  This recipe has been floating around Pinterest for a while.  I decided to give it a try!

Cucumber Feta Rolls


As much as I'd love to claim this recipe as my own, it is not.  You can find the full recipe here.

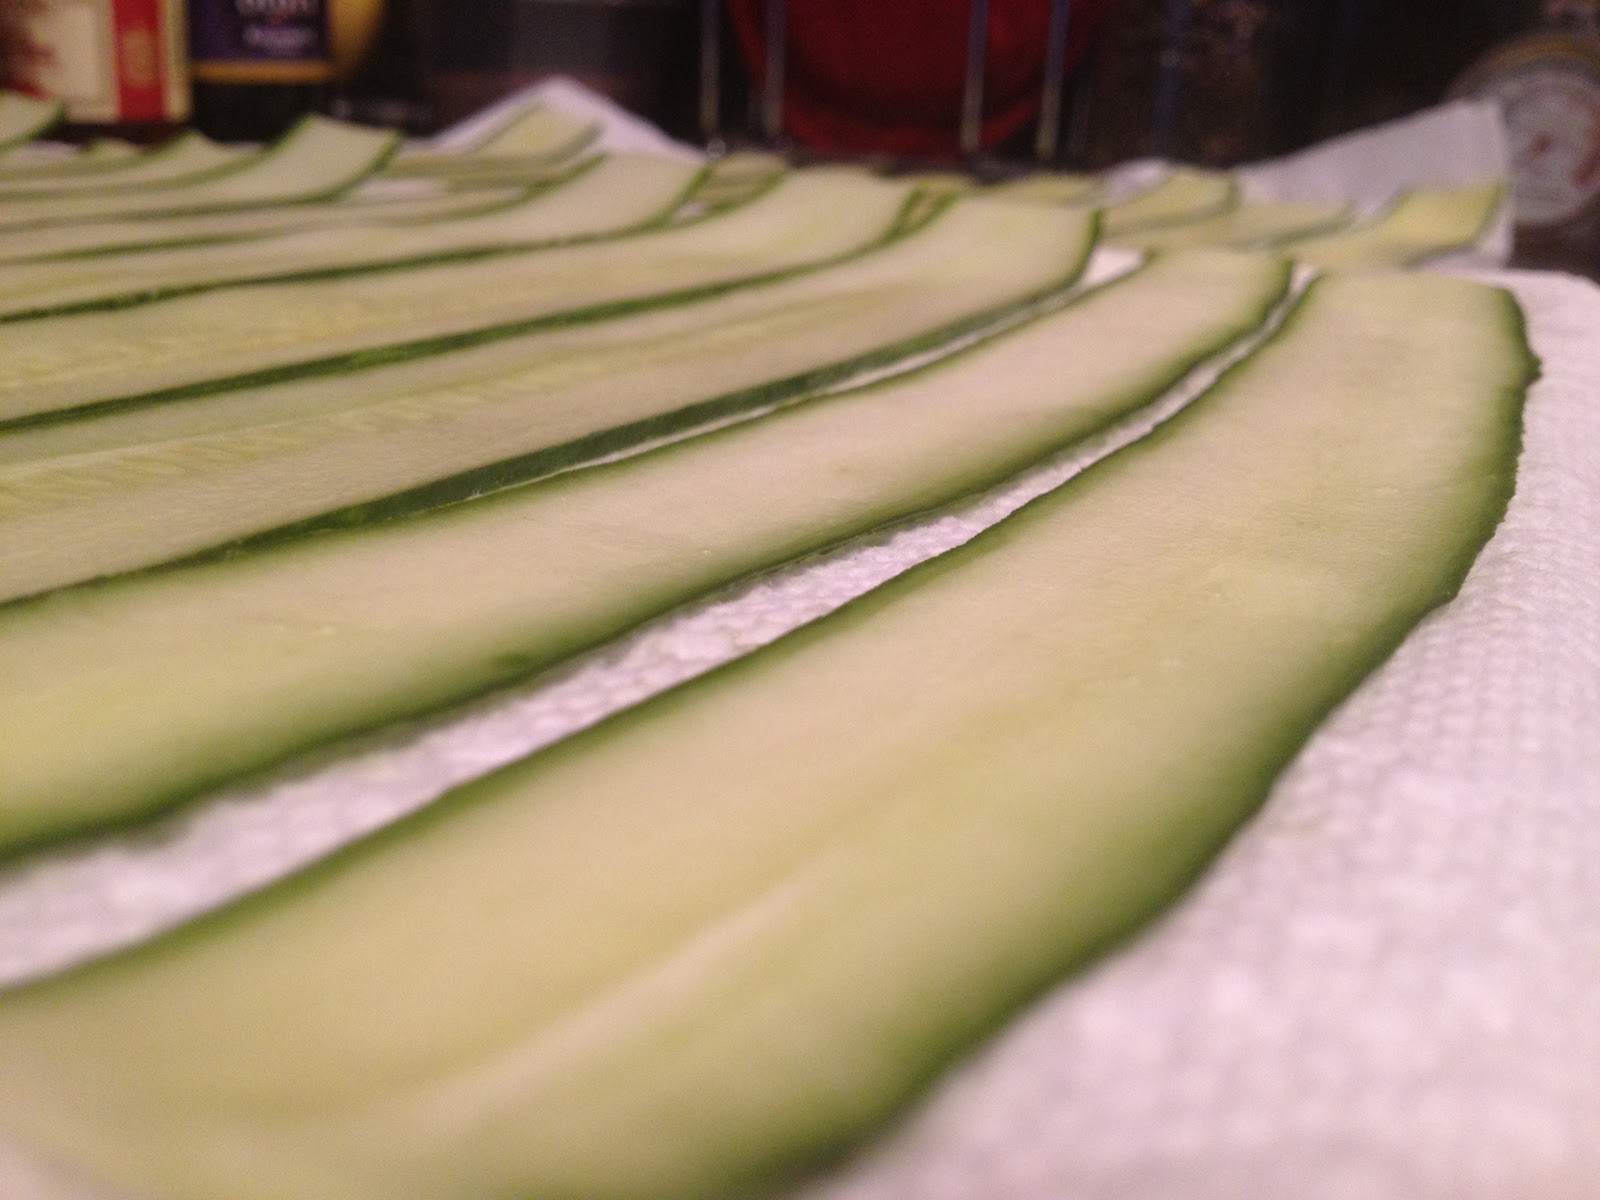
Use a vegetable peeler to create your cucumber slices.  For this recipe (and really any recipe that calls for cucumbers), I like to use "English" or "Hot House" cucumbers.  They're longer and leaner, and have less seeds. Peel one strip off of the cucumber, then in the same spot peel one more strip.  This will create a "flat" surface so the cucumber doesn't roll around on you.  After you flip the cucumber over to sit on the flat side, make the same two peels on the top side.  Continue to peel in the same fashion until you get to the seeds (you will have a couple strips that have some seeds, that's ok).  Once you've got all the peels you're going to get from one side, flip back over and peel slices from the bottom side until you get to the seeds.  Do this with 2-3 cucumbers (I needed about 2 1/2 cucumbers since I don't use the middle). Lay the slices out on paper towels while you make the filling.

In a bowl, mix the feta and Greek yogurt with a fork.  Add in the chopped sun dried tomatoes, chopped Kalamata olives, dill, lemon juice and pepper.


Place 1-2 tsp. of the mixture at the end of each cucumber slice.  If there's one end of the cucumber that has some seeds and one end that doesn't, place the filling on the end with seeds (so it ends up in the middle).  Roll up the cucumber around the filling and secure with a toothpick.  If there are too many seeds, the toothpick won't hold in the roll very well when you go to pick it up.


I think these also might be good with a dried cranberry & pecan mixture.  I might have to try that.  I'll let you know if I try it.  Let me know if you try it first! 


IN A NUTSHELL:

2 cucumbers
6 ounces crumbled feta
3 tablespoons Greek yogurt
2 1/2 - 3 1/2 tablespoons finely diced sundried tomatoes or red bell pepper
8 - 12 pitted kalamata olives, roughly chopped
1 tablespoon roughly chopped dill or oregano
2 teaspoons lemon juice
pinch of pepper, or to taste

"Slice" cucumber with vegetable peeler.  Lay flat on paper towels.  Mix remaining ingredients with fork.  Place 1-2 tsp filling on end of cucumber slice.  Roll.  Secure.  Enjoy without guilt.

***Also good with diced roasted red peppers in place of the olive and tomatoes.***

Sunday, June 10, 2012

Bang Bang Shrimp Tacos

A little bit sweet.  A little bit spicy.  A little bit crunchy.  All-over yummy. 


 The idea behind the shrimp in this recipe comes from the Bang Bang Shrimp appetizer on the menu at Bonefish Grill.  Sweet/spicy goodness.  I decided to try making it myself, and then decided it would make fabulous tacos.

Google is always my friend when it comes to finding out how to make something.  After reviewing several "copy cat" recipes, I came up with this one.  [EDIT: I've noticed that this recipe gets Google'd a lot, so I should reference that this is not a true copy-cat recipe; its my variation, so you will not find this to be exactly like that at the restaurant.]

A couple tips to begin: 1) Frozen shrimp is measured in size by how many shrimp are in a pound.  I generally use 60-80 (medium) shrimp for this recipe (meaning there are 60-80 shrimp per pound).  2) Its easiest if you buy the shrimp already peeled and de-veined.  But make sure the shrimp you buy is RAW (grey-ish in color, not pink).

Here's what you'll need:
Raw shrimp, about 12 (if using 60-80 shrimp)
3-4 Tbsp Corn Starch
1 Tbsp Lemon Pepper (I like to use the Mrs. Dash kind with no salt)
1 1/2 Tbsp Chili Powder
1 tsp Salt (omit if your lemon-pepper contains salt)
1 tsp Ground Black Pepper
Thai Sweet Red Chili Sauce
Diced Fresh Tomatoes
Diced Avocado
Shredded Cheddar
2 flour tortillas (small/fajita size)


Rinse thawed shrimp and pat dry with paper towels.  In a plastic zipper baggie, mix together corn starch, lemon pepper, chili powder, salt & pepper.  Close baggie and shake to mix.  Add shrimp to bag and shake to coat.  Remove shrimp from the bag with your hands, and shake off excess coating mixture.

Saute in non-stick pan heated to medium to medium-high, with a small amount of oil (about a Tbsp - enough to make the coating crisp, but not enough to "deep-fry" the shrimp).


Cook for a couple minutes, then turn each shrimp with a fork.  Cook an additional couple minutes, until the shrimp is cooked through (shrimp cooks quickly).

Squirt some Thai Sweet Red Chili Sauce into pan over shrimp.  I'm not certain how much, but see the picture to the left to get an idea:

Toss shrimp in Chili Sauce to coat.  I tried to get a picture of me doing this by tossing the shrimp in the skillet, but, well, that's not easy to get a picture of.  If you've not yet mastered that skill, feel free to use a spoon.  Make sure to move the skillet off of the burner so that, while the shrimp stays hot while you're chopping the remaining taco toppings, it will not continue to cook.

Chop tomato and avocado into a small dice and shred the cheese.  


A tip for cutting the avocado: Once you halve the avocado, cut while still in the peel, then remove with a spoon.  I like to add a little bit of salt, pepper, garlic powder and a couple drops of lime juice to the avocado.  This is to guacamole what pico-de-galo is to salsa.  


Warm tortillas in the microwave about 20 seconds, and proceed to build your tacos.


Want even more yummy goodness?  Heat 1-2 Tbsp oil in a skillet, and fry the tortillas a few (10-20) seconds on each side.

IN A NUTSHELL:

Raw shrimp, about 12 (if using 60-80 shrimp)
3-4 Tbsp Corn Starch
1 Tbsp Lemon Pepper
1 1/2 Tbsp Chili Powder
1 tsp Salt
1 tsp Ground Black Pepper
Thai Sweet Red Chili Sauce
Diced Fresh Tomatoes
Diced Avocado
Shredded Cheddar
2 flour tortillas (small/fajita size)

Mix dry ingredients in plastic zipper bag, add shrimp and shake to coat.  Saute in about 1 Tbsp oil, coat with Thai Sweet Red Chili Sauce.  Dice tomatoes and avocado, shred cheese.  Warm tortillas and put it all together.  Sweet... Spicy... Crunchy goodness.


NOTE: Making more than 2 tacos?  You don't necessarily need to increase the dry ingredients.  This mixture will probably coat enough shrimp for several tacos.

Thursday, May 24, 2012

Sausage Bruschetta Pizza

Sausage Bruschetta Pizza: quite possibly my FAVORITE summer meal.  I classify this as a summer meal because of two ingredients: tomatoes and basil.  While you can find both of these in the grocery store year-round, they're just better in the summer, period.  Living alone, I make this in the "personal" size, although you could certainly make a full-size pizza by varying the amount of each ingredient.

I'll take this quick break here to give credit where credit is due.  I did not think up this idea all on my own.  However, its been years since I once saw this idea in a magazine somewhere, and I honestly can't remember where.  The fact is, though, that although the general idea was not mine, the recipe is.  :)

Here's what you'll need:
1 Individual Size Thin and Crispy Pizza Crust
2 Tbsp Pizza Sauce
1 link Sweet Italian Sausage
Grape Tomatoes (about 8)
1-2 Tbsp Fresh Chopped Basil
Fresh Grated Parmesan (about a Tbsp)
Minced Garlic (about a Tbsp) - if fresh, 1 small clove
Fresh Mozzarella (Pearls)


First, pre-heat your oven to 400 degrees (F).  (Bear with me on the remaining directions, I'm going to write them in "Cooking for Dummies" style.  My friends will appreciate this.)

Next, you're going to cook the sausage.  First you need to cut the casing off the link.  You'll do that like this.
 <--  (Cut the casing from one end to the other, then peel off.)


Once you've peeled off the casing (which should be discarded, by the way), you'll brown the sausage just like you would hamburger.  Once it is browned, drain any grease and let cool a little (so you don't burn yourself later).  If you're not familiar with how to brown hamburger (seriously, "Cooking for Dummies"), Google it. Here's my photo example. -->


Meanwhile, while the sausage is browning, you're going to prep the remaining toppings.  Dice the tomatoes into a small dice (I generally quarter the tomatoes length-wise, then cut into 3-4 sections).  I recommend salting the tomatoes lightly and placing in a strainer for several minutes to drain out extra liquid.  I've already used grape tomatoes instead of cherry tomatoes, as grape tomatoes are generally less juicy anyway, but the less liquid you put on a pizza the better. [EDIT: tonight I roasted the tomatoes in the oven a bit before making the bruschetta, which helped tremendously with the moisture content.  The flavor was changed slightly, but overall was a good change.  Directions: Dice tomatoes, lightly salt then place in single layer in baking dish sprayed with cooking spray.  Place in 400 degree oven about 10 minutes.]


Next, chop the basil.  I find that while you can buy fresh basil in the store, its much more economical to grow it yourself.  All you need is a pot of soil, sun and water.  When cutting basil off the plant, I recommend cutting off an entire stalk with several leaves.  This promotes good growth of the plant, and keeps it from flowering (not something you want your basil to do unless you're done with it for the season).  Cut the leaves off the stalk, and layer (biggest leaf at the bottom). 


Once you've layered your leaves, you will roll them to make cutting easier. Hold rolled basil leaves tightly and cut "julienne" style.  Use of a sharp knife is highly recommended.


Mix together tomatoes, basil, fresh Parmesan and garlic.  You can use the minced garlic found in a jar at the store, or mince your own fresh garlic.  Fresh will taste better, but let's face it, garlic is not the star of THIS meal. (If using fresh, use one SMALL clove, as fresh is much more potent than the stuff in the jar.)


When buying fresh mozzarella, you have choices.  You can buy it in a "ball," "log," or "pearls."  for this recipe, I choose the pearls, although you can cut any into what you will need for this pizza.  Take a handful of the pearls and cut into quarters.


At this point, you're finally ready to assemble your pizza.  Tips:


1) You don't need to measure the pizza sauce.  Use as much as you like.  Can you use spaghetti sauce?  Yes.  Whatever you'd normally put on your pizza is perfect for this one.


2) Try to layer evenly.  Does it need to be perfect?  No.  But when you eat it, you want to taste a little bit of everything in each bite.  After all, that's what eating is all about: the taste.  You should enjoy your food. 

3) Be generous with the cheese.  If you choose to use the "ball" of mozzarella and slice instead of cut into pieces, make the slices kind of thick.


4) Let the cheese brown a little.  It adds more flavor.